Postgame checklist and all Seven Sages locations
Plan eastern Unova, locate the six remaining Plasma sages, collect their TMs, train for Alder and separate optional catches from event requirements.
Story and late-game spoilers.
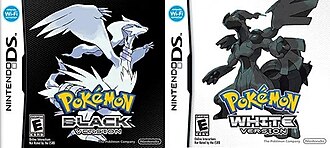
Original Black and White; their sequels have different routes and encounter availability.
What changes after Ghetsis
Restart the completed save in Nuvema Town. Looker asks for help locating the remaining sages, and the National Pokédex expands your collection reference. Eastern Unova opens beyond the main badge circuit, while several earlier locations gain new rooms, encounters or stronger trainers. The original story ending and the later Hall of Fame are different milestones.
The level increase in post-story trainer battles is substantial. Heal at each new town, scout the next opponent and train before attempting the rematch League. A party that defeated Ghetsis can still be overwhelmed by eastern veterans or Cynthia. Choose one objective per trip: a sage, an HM, a new catch or training. The list below can be completed in a flexible order.
Six remaining sages: locations and exact TM rewards
| Sage | Location | Access / preparation | TM reward |
|---|---|---|---|
| Gorm | Dreamyard basement | Enter the newly available lower ruin; stronger trainers | TM75 Swords Dance |
| Zinzolin | Cold Storage container, Driftveil | Revisit the container from the story mission | TM01 Hone Claws |
| Bronius | Chargestone Cave B2F | Defeat the two defending Plasma grunts | TM69 Rock Polish |
| Ryoku | Deep Relic Castle maze | Follow the newly opened post-story passages | TM04 Calm Mind |
| Rood | Route 18 | Surf from Route 1 through Route 17 currents | TM32 Double Team |
| Giallo | Upper Route 14 | Surf and Waterfall for the high paths | TM08 Bulk Up |
Ghetsis is the seventh sage and has already been dealt with during the finale. Looker’s hunt consists of these six remaining characters; you do not need to find Ghetsis in an additional ordinary hideout. Talking to each sage triggers dialogue, the TM reward and Looker’s appearance. Bronius adds battles before the arrest is completed.
A practical western sage circuit
Begin with the locations close to familiar Pokémon Centers. Revisit Dreamyard for Gorm and the basement trainers, then Driftveil’s Cold Storage for Zinzolin. Equip the movement and battle party for Chargestone Cave and descend to Bronius. Keep enough healing for the defending grunts and verify that the TM has reached your Bag before leaving.
Make Relic Castle its own trip. The post-story descent is longer than the early fossil room, and the maze leads towards both Ryoku and Volcarona. Save before any optional catch and preserve enough supplies to finish the arrest first. You can leave a catch for later without losing progress on the sage task.

Route 18 and Route 14 sage trips
For Rood, Surf from Route 1 through Route 17’s sea currents to Route 18. The island has useful exploration rewards, including the Waterfall HM and the Larvesta Egg gift. Collect Waterfall if your later plan includes Giallo or Abundant Shrine, and leave party space if accepting the Egg.
For Giallo, travel to the eastern Route 14 area and use Surf with Waterfall to reach the upper paths. Keep the sage objective separate from Landorus: the arrest does not require both roamers, while the shrine encounter does. Once all six arrests are done, the hunt has supplied six reusable TMs and additional Plasma backstory. There is no ordinary N rematch unlocked by finishing this search.
Eastern Unova exploration circuit
- Opelucid → Route 11 → Village Bridge → Route 12 → Lacunosa opens the northern side of the eastern loop. Heal at Lacunosa before the coastal branch.
- Route 13 leads towards Undella and branches to Giant Chasm, where level 75 Kyurem is a later catching objective.
- Undella provides the beach and Dive access for Undella Bay and Abyssal Ruins. Save before speaking to Cynthia if you are unprepared for a high-level battle.
- Route 14 leads towards Black City or White Forest and also branches to Abundant Shrine through upper water paths.
- Route 15 contains the Poké Transfer Lab and leads towards Marvelous Bridge. The bridge returns to Route 16 and Nimbasa.
The loop combines catches, trainer experience and item collection. Bring enough balls for new earlier-generation species but avoid weakening the whole party during a long capture attempt. Returning to a Pokémon Center is more efficient than trying to continue through several veteran battles with depleted PP.
High-value optional catch projects
| Target | Where / method | Preparation |
|---|---|---|
| Volcarona Lv.70 | Deep Relic Castle | Status and controlled damage; Dusk Ball room exception |
| Kyurem Lv.75 | Giant Chasm inner chamber | Full catching party and a saved attempt |
| Musharna with Telepathy | Dreamyard basement on Friday | Check day and special encounter rather than ordinary evolution |
| Landorus Lv.70 | Abundant Shrine | Both roamers; your native roamer must match current Trainer ID |
| Older fossil species | Daily Twist Mountain worker gift | Revive at Nacrene Museum; track duplicates |
| Version-area species or services | White Forest / Black City residents | Original resident population affects availability |
These are separate from historical event distributions. Victini still needs the Liberty Pass encounter condition, and Keldeo, Meloetta and Genesect are not ordinary post-story grass catches. Use version differences and legendary encounters for the acquisition requirements before promising a complete ownership list.

Repeatable training and stronger battles
Nimbasa’s sports arenas offer repeatable trainer battles and ordinary experience. Cheren can be rematched at Victory Road after his Route 5 conversation; Bianca’s laboratory rematches are a weekend objective after defeating Alder. Royal Unova adds timed daily battle cruises. Equip the Lucky Egg on a member you are actively training, and use safe switches when bringing a new recruit into stronger fights.
Cynthia in Undella and the expanded League are optional late targets. The rematch Elite Four use level 71 members with level 73 aces, followed by Alder’s level 75 team and level 77 Volcarona. Check the full rematch team tables before returning to the League. The Battle Subway supplies BP rather than ordinary experience, so it serves a different goal from levelling the party.
A flexible completion checklist
- Receive the National Pokédex and Looker’s sage request after the finale.
- Arrest Gorm, Zinzolin, Bronius, Ryoku, Rood and Giallo; verify each TM in the Bag.
- Explore the eastern loop, visit every rest town and record remaining movement requirements.
- Return to early caves and water branches for missed items or encounters.
- Complete chosen legendary and fossil projects using their exact prerequisites.
- Build a dependable training routine, then defeat the expanded Elite Four and Alder.
- Choose a final optional project: BP rewards, Musical Props, relic treasure or the obtainable Pokédex.
Completion depends on your goal. An offline story-and-exploration save can finish the sages and Alder without every event species or historical online feature. Track any trading, event item or second-system requirement beside the relevant ownership entry. That keeps a missing external requirement from obscuring the ordinary tasks still available in your cartridge.
After each sage, confirm the TM reward and arrest scene before marking that location complete.
References
- Bulbapedia: Seven Sages
- Serebii: sage hunt and original finale
- Bulbapedia: original Black / White walkthrough, part 13
- Bulbapedia: original Black / White walkthrough, part 14
- Bulbapedia: original Black / White walkthrough, part 16
- Bulbapedia: original Black / White walkthrough, part 17
- Bulbapedia: original Black / White walkthrough, part 18
- Bulbapedia: Undella Town
- Bulbapedia: Victory Road (Black and White)
- Serebii: daily and weekly activities