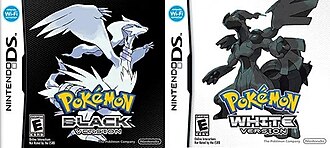
Pokémon Black and White complete story walkthrough
Follow the original Unova adventure from Nuvema Town through all eight badges, Team Plasma, Victory Road and the N / Ghetsis finale.
Story and late-game spoilers.
Original Black and White; their sequels have different routes and encounter availability.
Before you begin: version and progress checks
This walkthrough follows Pokémon Black and Pokémon White on Nintendo DS. Your journey starts in Nuvema Town; the Aspertia opening, Virbank Gym and Plasma Frigate belong to Black 2 / White 2. Story spoilers are included because later objectives depend on earlier events. Use the numbered phases as checkpoints: when the stated event is finished, move to the next phase.
Keep a varied party, healing, Poké Balls and a few Escape Ropes. Trainer battles teach you more about the next team than repeatedly overlevelling one starter. Optional collecting can wait when a route requires a movement ability you have not received. The Gym teams and puzzles reference supplies exact opponents and rewards; the League and finale guide covers the last battles.
1. Nuvema Town, Route 1 and Accumula Town
Choose Snivy, Tepig or Oshawott in your bedroom and complete the opening battles with Bianca and Cheren. Visit Professor Juniper’s laboratory, receive the Pokédex and follow the catching demonstration on Route 1. Travel north to Accumula Town and complete the Pokémon Center introduction. Outside, listen to Team Plasma’s speech and fight N.
Use this stretch to learn switching, recovery and the difference between catching and merely seeing a Pokémon. An early Lillipup can add a direct physical attacker while your starter develops its elemental move. Heal before leaving town, then take Route 2 towards Striaton. The route’s story conversations guide your first steps; you do not need to search for an alternative starting city.

2. Route 2, Striaton and the Dreamyard gift
Continue along Route 2, battle Bianca near Striaton and visit the Trainers’ School to find Cheren. Before challenging the Gym, explore the accessible Dreamyard east of town. The gift-giver supplies Panpour if you chose Snivy, Pansage if you chose Tepig, or Pansear if you chose Oshawott. This monkey has the advantage against the specialist you will face.
Striaton’s leader uses a level 12 Lillipup and a level 14 monkey. The curtain quiz asks you to choose the type that beats the displayed type: Water beats Fire, Grass beats Water, and Fire beats Grass. Train the gift enough to use its elemental attack reliably, keep health for the ace, and win the Trio Badge. Collect TM83 Work Up.
3. Cut, Dream Mist and Route 3
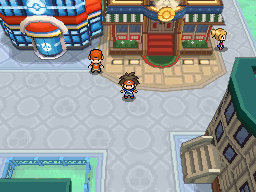
After the first Gym, meet Fennel and receive HM01 Cut. Teach it to a compatible Pokémon, return to the Dreamyard and cut the small tree blocking the deeper ruin. Follow Bianca and rescue Munna from Team Plasma. The Dream Mist event ends with a return to Fennel’s laboratory and receipt of the C-Gear.
Leave Striaton by the northern route once the event is complete. Route 3 introduces the Day Care and a double battle. When Plasma steals a Pokémon, follow Cheren into Wellspring Cave, defeat the thieves and finish the rescue. A blocked story path usually means this sequence remains unfinished. Proceed along Route 3 to Nacrene City rather than trying to cross water before Surf is available.

4. Nacrene City and Lenora’s Basic Badge
Explore Nacrene’s museum and prepare for Lenora at the library Gym behind it. Her Herdier is level 18 and Watchog level 20. Fighting coverage is helpful; the outside of Pinwheel Forest offers relevant recruits before the badge. Follow the book clues, speak to the trainers guarding the shelves, and open the staircase to Lenora.
Watchog can use Hypnosis, and Retaliate is especially dangerous immediately after Herdier faints. Keep a healthy switch ready for that turn rather than sending a weakened attacker into the boosted move. Win the Basic Badge and TM67 Retaliate. The museum theft then triggers the next Plasma pursuit; the recovered Dragon Skull is a separate story objective from obtaining the badge.
5. Pinwheel Forest and Skyarrow Bridge
Follow Burgh into Pinwheel Forest to retrieve the stolen Dragon Skull. The paved path and wooded path serve different purposes: use the forest trail for the Plasma chase and continue until the final encounter returns the stolen object. Speak with the characters after the recovery, then leave by the northern exit.
The woods introduce useful Bug, Grass and other party options, but a grass patch is not necessarily the same encounter area as the forest exterior. Complete the chase before treating the paved road as a shortcut to the next city. Cross Skyarrow Bridge into Castelia and visit the Pokémon Center. This is a good point to sell ordinary valuables and replenish supplies after the early routes.

6. Castelia City and Burgh’s Insect Badge
Find the Team Plasma incident at the harbor, help recover Bianca’s stolen Pokémon and follow Burgh through the city investigation. Once the confrontation is resolved, enter the Gym. Push through honey walls and use the switches that remove barriers. Burgh uses Whirlipede and Dwebble at level 21, then Leavanny at level 23.
A Fire or Flying option can pressure Leavanny, whose Bug / Grass typing gives it a major weakness to those attacks. Dwebble adds Rock typing, so choose a separate answer instead of assuming every Bug opponent behaves alike. Win the Insect Badge and TM76 Struggle Bug. After the exit conversation, head north through the city gate to Route 4; rival battles and route events accompany that departure.
7. Route 4, the desert and Nimbasa’s Bolt Badge
Cross Route 4 towards Nimbasa. Desert Resort and the upper Relic Castle are useful optional detours for catches, items and a fossil choice. The early visit does not give access to every underground floor. In Nimbasa, assist the Day-Care man, explore the amusement park and complete the encounter with N before the Gym challenge.
Elesa’s roller coaster Gym uses switches to connect the next platform. Her two Emolga are level 25 and Zebstrika level 27. Prepare a response to airborne Emolga as well as a Ground answer for Zebstrika. Win the Bolt Badge and TM72 Volt Switch, then use Route 5 to continue the story. Nimbasa also becomes a convenient hub for the Musical, sports arenas and Battle Subway.

8. Route 5, Driftveil Drawbridge and Cold Storage
Meet the story characters on Route 5 and continue when the drawbridge is lowered. In Driftveil, Clay directs attention to escaped Team Plasma members. Search Cold Storage south of the city, cross the icy floor and investigate the open container with Cheren. Defeating the group there unlocks the Gym sequence.
Clay’s mine Gym uses elevators and narrow girders. He fields level 29 Krokorok and Palpitoad, then level 31 Excadrill. Carry reliable Water, Grass, Fighting or Ground options as appropriate to each dual type. Win the Quake Badge. TM78 Bulldoze is delivered later at Chargestone Cave’s entrance, so absence of the TM immediately after the battle is expected.
9. Route 6 and Chargestone Cave
Travel northwest along Route 6 and meet Clay at Chargestone Cave. He removes the web at the entrance and gives TM78 Bulldoze. Inside, push small floating stones towards the larger magnetic rocks. Professor Juniper gives the Lucky Egg, a useful held item for party training. Descend into the cave’s basement, follow the Plasma route and battle N before the Mistralton exit.
Joltik, Ferroseed and other cave species offer new team roles. Save a separate catching trip for the deepest optional branches if the immediate objective is getting to the next city. Once the cave doctor has been defeated, he can restore your party, making that location a useful reference point during exploration. Leave by the northern side and heal in Mistralton.

10. Route 7, Celestial Tower and Skyla’s Jet Badge
Skyla first asks you to follow her to Celestial Tower on Route 7. Climb the tower and ring its rooftop bell to finish the visit, then return to the airport Gym. The original Gym uses cannons; move between their landing platforms until you reach Skyla. The wind tunnel puzzle described in some guides is from the sequels.
Skyla uses Swoobat and Unfezant at level 33 and Swanna at level 35. Swanna’s Water / Flying typing makes Electric particularly useful. Win the Jet Badge and TM62 Acrobatics. Continue along Route 7 towards Twist Mountain; the subsequent Cheren and Alder events give you Surf. Your next main destination is Icirrus, with water exploration now available as an optional branch.
11. Optional Surf circuit before the mountain
Surf opens a southern excursion from Route 1 through Route 17’s currents to Route 18. It also opens Mistralton Cave from Route 6. These trips can supply Pokémon, items and legendary side objectives, but they do not replace the next badge. Bring appropriate movement moves and keep a clear route back to a Pokémon Center.
Mistralton Cave needs preparation for darkness and boulders. Cobalion’s encounter there can open further Swords of Justice objectives. Route 18 has the Larvesta Egg gift; leave party space if that is your target. If the party is already ready for Brycen, continue the story and return later with stronger utility Pokémon. Use the Unova directory to separate optional branches from the badge route.
12. Twist Mountain, Icirrus and the Freeze Badge
Work through Twist Mountain’s exterior walkways and cave passages to reach Icirrus City. Winter snow changes which ledges can be reached, so route instructions for another season may not fit your screen. Explore the city and enter Brycen’s ice Gym, using the curved bumpers and switches to change the direction of your slides.
Brycen uses level 37 Vanillish and Cryogonal, then level 39 Beartic. Fire, Fighting and Steel attacks are useful starting points, with defensive care against Beartic’s Water coverage. Win the Freeze Badge and TM79 Frost Breath. The next story event takes place at Dragonspiral Tower north of the city; leaving immediately for Opelucid skips an essential part of the plot.
13. Dragonspiral Tower, Relic Castle and the dragon stone
Enter Dragonspiral Tower after the Icirrus story event and climb past the Plasma grunts. Broken columns, one-way jumps and circular upper paths lead to N’s revelation at the summit. Afterward, follow the search to Relic Castle in Desert Resort. Its previously blocked lower floors are now part of the story.
Descend through the sand pits and complete the bottom-floor encounter. Then answer the call directing you to Nacrene Museum. Lenora gives the Light Stone in Black or Dark Stone in White. Your player’s dragon is Reshiram in Black and Zekrom in White. The stone is not awakened at this stage; carry it while continuing through Route 8, Tubeline Bridge and Route 9.
14. Opelucid, Route 10 and Victory Road
Finish the Opelucid conversations and challenge the Dragon Gym. Drayden leads in Black; Iris leads in White. Their shared species are Fraxure and Druddigon at level 41 and Haxorus at level 43. Navigate the dragon-shaped walkways and switches, win the Legend Badge and receive TM82 Dragon Tail.
Juniper’s departure conversation provides the Master Ball. Follow Route 10, complete the final rival encounter and pass the eight badge gates into Victory Road. Use the cave floors, exterior ledges and slide shortcuts to reach the League. Optional branches include Terrakion’s chamber when its prerequisite is met. Heal, restore PP and restock before entering the Elite Four chambers; the next phase is a long battle sequence.

15. Elite Four, N’s Castle and Ghetsis
Defeat Shauntal, Grimsley, Caitlin and Marshal in any order, healing between battles. Their initial teams have three level 48 members and a level 50 ace. Activate the central platform after all four victories. The first League visit leads into N’s Castle, where the Gym Leaders help clear the way and castle rooms provide support.
Awaken and catch Reshiram in Black or Zekrom in White, then face N’s six-member team and Ghetsis. N’s dragon is level 52, his other Pokémon level 50; Ghetsis’s ace Hydreigon is level 54 and his other members level 52. Complete the final scenes and credits. On restarting, the postgame and Seven Sages guide helps organize eastern Unova, new catches and the much stronger Alder rematch.
Finish the current story event and heal before moving to the next numbered checkpoint.
References
- Nintendo: original Black / White launch and Unova features
- Bulbapedia: original Black / White walkthrough, part 1
- Bulbapedia: original Black / White walkthrough, part 2
- Bulbapedia: original Black / White walkthrough, part 3
- Bulbapedia: original Black / White walkthrough, part 4
- Bulbapedia: original Black / White walkthrough, part 5
- Bulbapedia: original Black / White walkthrough, part 6
- Bulbapedia: original Black / White walkthrough, part 7
- Bulbapedia: original Black / White walkthrough, part 8
- Bulbapedia: original Black / White walkthrough, part 9
- Bulbapedia: original Black / White walkthrough, part 10
- Bulbapedia: original Black / White walkthrough, part 11
- Bulbapedia: original Black / White walkthrough, part 12