A Link to the Past Secrets & Minigames
The hidden upgrades and side activities the game barely explains: the Pyramid fairy, the smiths, the Mad Batter, the medallions, minigames and more.
The Pyramid Fairy
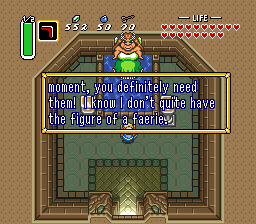
- Buy the Super Bomb from the Dark World Bomb Shop.
- Lead it to the cracked wall on the Pyramid of Power’s second tier and let it explode.
- Enter the opening and toss your Tempered Sword and Bow into the pond when the fairy appears.
- Reward
- Golden Sword and Silver Arrows (the arrows are needed to finish Ganon)
 Super Bomb
 Tempered Sword
The Super Bomb
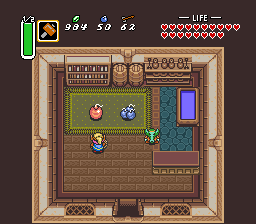
- Clear the Ice Palace and Misery Mire to win crystals 5 and 6.
- Return to the Bomb Shop and pay 100 Rupees.
- The bomb follows Link: he can’t dash with it or take it over ledges.
- Reward
- One Super Bomb, strong enough to crack the Pyramid of Power
- Need
 Moon Pearl
The Smiths’ Tempered Sword
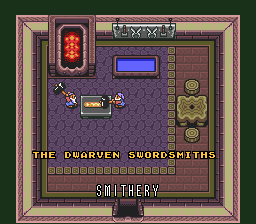
- Find the frog-like smith south of the Village of Outcasts, walled in by heavy rocks you lift with the Titan’s Mitt.
- Let him follow you and use the Magic Mirror to bring him back to the Light World.
- Walk him home to the Smithy east of Kakariko Village.
- Leave your sword with the twins, step away for a moment, then come back to collect it.
- Reward
- Tempered Sword (twice the power of the Master Sword)
 Titan’s Mitt
 Magic Mirror
 Master Sword
The Locked Chest
Where: Old smithy site in the Dark World → desert entrance (Light World)
- After rescuing the smith, find the locked chest where the Smithy stands in the Light World.
- Have it follow you and use the Magic Mirror to return to the Light World.
- Take it to the quiet man sitting by the sign at the entrance to the Desert of Mystery.
- Reward
- A Bottle
Waterfall of Wishing
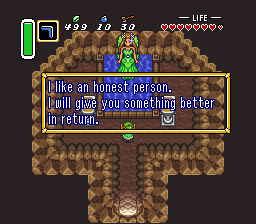
- Swim into the centre of the waterfall with Zora’s Flippers.
- Throw an item into the pond when asked and answer the fairy honestly.
- Reward
- Boomerang → Magical Boomerang; Fighter’s Shield → Fire Shield; an empty Bottle comes back filled with Green Potion
- Need
 Zora’s Flippers
Pond of Happiness
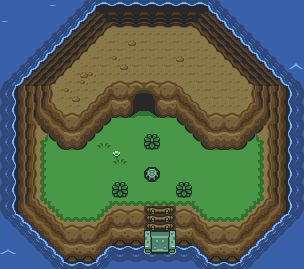
- Swim to the island with Zora’s Flippers and enter the cave.
- Throw Rupees into the pond, a few at a time.
- Each time your total reaches 100 Rupees, the Queen of Fairies appears and lets you carry more Bombs or arrows.
- Reward
- Higher Bomb and arrow capacity (up to 50 Bombs and 70 arrows)
- Need
- Zora’s Flippers
The Mad Batter
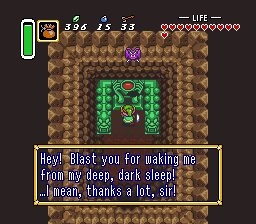
- Pound down the stake blocking the hole with the Magic Hammer (or use the Magic Mirror from the Dark World to land beside it).
- Drop down the hole and walk north to the altar.
- Sprinkle Magic Powder on the altar.
- Reward
- Magic consumption halved
 Magic Hammer
 Magic Powder
The Golden Bee
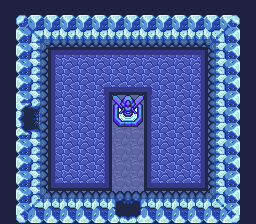
- Enter the Ice Cave and bomb the cracked wall to find a fairy fountain room.
- Dash into the fairy statue with the Pegasus Boots.
- Catch the Golden Bee with the Bug-Catching Net and keep it in a Bottle.
- Reward
- A Golden Bee that fights for you much longer than a normal Bee
 Bombs
 Bug-Catching Net
 Bottle
Chris Houlihan’s Room
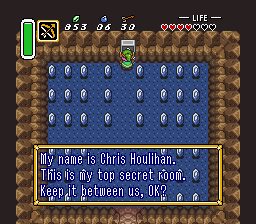
- The game sends Link here when it detects an invalid position.
- Players trigger it with Pegasus Boots dash tricks timed with a screen change; several methods are known, some using Bombs.
- Read the telepathy tile and grab the Rupees.
- Reward
- 45 Blue Rupees and a message from ‘Chris Houlihan’
- Need
 Pegasus Boots
Digging Game
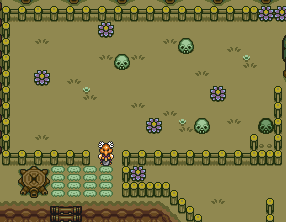
- Pay the keeper 80 Rupees.
- Dig up the field with the shovel he lends you before time runs out.
- Reward
- Rupees and stock items, with a small chance of a Piece of Heart
- Need
- Moon Pearl
Treasure Chest Games
Where: South Kakariko Village, north Lost Woods, and the Village of Outcasts
- Pay the keeper and pick your chests: one of three in Kakariko and the Lost Woods, two in the Village of Outcasts.
- Bigger stakes pay bigger prizes.
- Reward
- Rupees; the Village of Outcasts game also hides a Piece of Heart
Archery Game
Where: Small shop south of the Village of Outcasts, Dark World
- Pay the keeper for a handful of arrows.
- Shoot the targets as they slide past; hits in a row pay more.
- Reward
- Rupees
- Need
- Moon Pearl
 Bow
The Kakariko Merchant
Where: Carpet just west of the weathercock in Kakariko Village
- Buy a Bottle from him for 100 Rupees.
- Bring him a fish carried all the way from the Great Swamp for a bundle of goods.
- Reward
- A Bottle; for the fish, Rupees, arrows, Bombs and a Magic Jar
The Lumberjacks’ Tree
Where: Beside the Woodsmen’s Hut, north of Kakariko Village
- Defeat Agahnim at Hyrule Castle; the lumberjacks then leave.
- Dash into their tree with the Pegasus Boots to knock the leaves off.
- Drop into the hollow stump.
- Reward
- A Piece of Heart in the cave below
- Need
- Pegasus Boots
Fortune Tellers
Where: North of Kakariko Village, beside the Lake Hylia shop, and north of the Village of Outcasts
- Pay between 10 and 30 Rupees.
- Listen to the hint about where to go next.
- Reward
- A hint for your next step
The Flute and the Bird
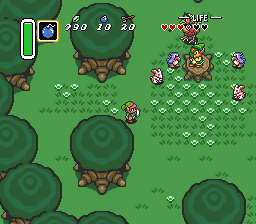
- Talk to the Flute Boy in the Dark World’s Haunted Grove to get the Shovel.
- Dig in the top-left corner of the Light World’s Haunted Grove to find the Flute.
- Optionally play it for the boy in the Dark World.
- Play the Flute beside the weathercock in Kakariko Village to free the bird.
- Reward
- The Flute: in the Light World it calls a bird that carries Link to one of eight spots
- Need
- Moon Pearl
 Shovel
 Flute
Bombos Tablet
Where: Clifftop at the edge of the Desert of Mystery, Light World
- In the Dark World, go to the spot that lines up with the clifftop and use the Magic Mirror.
- Read the tablet with the Book of Mudora.
- Raise the Master Sword to the sky.
- Reward
- Bombos Medallion
 Book of Mudora
Ether Tablet
Where: Across a bridge west of the Tower of Hera, Death Mountain
- Reach the Tower of Hera’s plateau on western Death Mountain.
- Cross the bridge to the west and read the tablet with the Book of Mudora.
- Raise the Master Sword to the sky.
- Reward
- Ether Medallion (needed to open Misery Mire)
The Catfish’s Quake Medallion
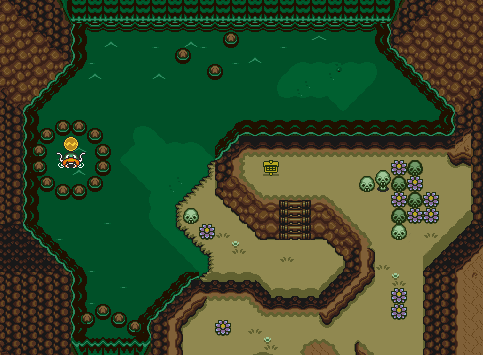
- Ignore the sign warning you not to throw things into the circle of stones.
- Pick up a skull, bush or even the sign and throw it into the ring.
- The woken Catfish hands over his medallion to be left alone.
- Reward
- Quake Medallion (needed to open Turtle Rock)
- Need
- Moon Pearl
The Magic Cape Grave
Where: Graveyard north of Hyrule Castle
- Find the grave ringed by dark rocks.
- Lift the rocks with the Titan’s Mitt, or use the Magic Mirror from the Dark World to land inside the ring.
- Dash into the gravestone with the Pegasus Boots and drop into the hole.
- Reward
- Magic Cape
The Cucco Revenge Squad
Where: Kakariko Village (and Dark World Cucco-like creatures)
- Keep hitting a Cucco.
- After enough blows, a flock swoops in from off-screen and attacks Link.
- Reward
- None – it’s a punishment, and a series first
FAQ
How do you get the Silver Arrows in A Link to the Past?
Buy the Super Bomb from the Dark World Bomb Shop. Lead it to the cracked wall on the Pyramid of Power’s second tier and let it explode. Enter the opening and toss your Tempered Sword and Bow into the pond when the fairy appears.
How do you get the Tempered Sword?
Find the frog-like smith south of the Village of Outcasts, walled in by heavy rocks you lift with the Titan’s Mitt. Let him follow you and use the Magic Mirror to bring him back to the Light World. Walk him home to the Smithy east of Kakariko Village. Leave your sword with the twins, step away for a moment, then come back to collect it.
What is Chris Houlihan’s room?
A hidden fail-safe room with 45 Blue Rupees and a message naming Chris Houlihan, a Nintendo Power contest winner. The game sends Link there when it can’t work out where he should be.
Sources & picture credits
- The Pyramid Fairy (Zeldapedia)
- The Super Bomb (Zeldapedia)
- The Smiths’ Tempered Sword (Zeldapedia)
- The Locked Chest (Zeldapedia)
- Waterfall of Wishing (Zeldapedia)
- Pond of Happiness (Zeldapedia)
- The Mad Batter (Zeldapedia)
- The Golden Bee (Zeldapedia)
- Chris Houlihan’s Room (Zeldapedia)
- Digging Game (Zeldapedia)
- Treasure Chest Games (Zeldapedia)
- Archery Game (Zeldapedia)
- The Kakariko Merchant (Zeldapedia)
- The Lumberjacks’ Tree (Zeldapedia)
- Fortune Tellers (Zeldapedia)
- The Flute and the Bird (Zeldapedia)
- Bombos Tablet (Zeldapedia)
- Ether Tablet (Zeldapedia)
- The Catfish’s Quake Medallion (Zeldapedia)
- The Magic Cape Grave (Zeldapedia)
- The Cucco Revenge Squad (Zeldapedia)
Guide text is original retrogameindex writing, checked against Zeldapedia. Screenshots, sprites and artwork © Nintendo; local copies archived from Zeldapedia file pages (listed on the image gallery).