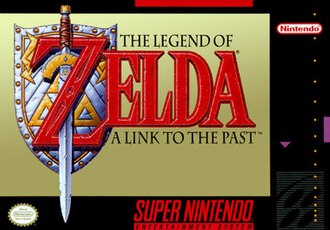
A Link to the Past Items: All 57 and Where to Find Them
Every weapon, tool, medallion, upgrade and quest item in the SNES game: what it does and exactly where you get it.
Swords
| Item | What it does | Where to get it |
|---|---|---|
 Fighter’s Sword | Link’s first sword, the weakest of the four levels. | Handed over by Link’s dying uncle in the secret passage into Hyrule Castle. |
 Master Sword | The sword of evil’s bane: twice as strong as the Fighter’s Sword and fires beams at full health. | Pulled from its pedestal deep in the Lost Woods once all three Pendants of Virtue are held. |
 Tempered Sword | The Master Sword reforged by the smiths, glowing red-orange and twice as strong again. | Reunite the frog-like Dark World smith with his partner at the Smithery near Kakariko, then leave the sword with them. |
 Golden Sword | The strongest sword, twice the power of the Tempered Sword. | Throw the Tempered Sword into the Cursed Fairy’s pond inside the Pyramid of Power. |
Shields
| Item | What it does | Where to get it |
|---|---|---|
 Fighter’s Shield | A small shield that blocks arrows, spears and rocks. | Received with the Fighter’s Sword from Link’s uncle; also sold in shops if lost. |
 Fire Shield | A sturdier red shield that can also block small fireballs. | Throw the Fighter’s Shield into the Waterfall of Wishing pond, or buy it for 500 Rupees in the Dark World shield shop. |
 Mirror Shield | The best shield, large enough to stop beam attacks such as Laser Eye blasts. | Big chest in Turtle Rock. Turtle Rock guide |
Armour
| Item | What it does | Where to get it |
|---|---|---|
 Green Clothes | Link’s ordinary green tunic, with no extra protection. | Worn from the start. |
 Blue Mail | Armour that reduces the damage Link takes from attacks. | Big chest in the Ice Palace. Ice Palace guide |
 Red Mail | The strongest armour, cutting damage even further than the Blue Mail. | Big chest in Ganon’s Tower. Ganon’s Tower guide |
Weapons
| Item | What it does | Where to get it |
|---|---|---|
 Boomerang | A thrown blue boomerang that stuns most enemies, flips switches and fetches items from a distance. | Chest in Hyrule Castle’s dungeon on the way to Zelda’s cell. Hyrule Castle guide |
 Magical Boomerang | A red, faster boomerang that flies further than the standard one. | Throw the Boomerang into the pond inside the Waterfall of Wishing and answer the fairy honestly. |
 Bow | Fires arrows to hit distant enemies and switches; the only way to hurt some foes such as Eyegores. | Big chest in the Eastern Palace. Eastern Palace guide |
 Silver Arrows | Upgraded arrows strong enough to fell almost anything in one shot, and the only way to finish off Ganon. | Given by the Cursed Fairy inside the Pyramid of Power after a Super Bomb opens her cracked wall. |
 Bombs | Explosives that damage enemies and blast open cracked walls and floors. | Found in grass, pots and chests, dropped by enemies, or bought (30 for 100 Rupees at the Dark World Bomb Shop). |
 Super Bomb | A huge bomb that follows Link until set down and can break the Pyramid of Power’s cracked wall. | Bought for 100 Rupees at the Dark World Bomb Shop once the Ice Palace and Misery Mire crystals are won. |
Tools
| Item | What it does | Where to get it |
|---|---|---|
 Lamp | Lights torches and casts a small glow so Link can find his way through dark rooms; uses a little magic per torch. | Chest in Link’s House at the very start (or a chest in Hyrule Castle if skipped). |
 Hookshot | A spring-loaded chain that latches onto chests, pots and blocks to pull Link across gaps; also stuns some enemies. | Big chest in the Swamp Palace. Swamp Palace guide |
 Book of Mudora | Translates ancient Hylian writing on stone tablets and monuments. | Dash into the bookshelf in the Library south of Kakariko Village with the Pegasus Boots. |
 Magic Hammer | A heavy hammer that pounds down pegs, flips turtle-shelled enemies and smashes frozen foes. | Big chest in the Palace of Darkness. Palace of Darkness guide |
 Shovel | Digs holes in soft ground, sometimes turning up Rupees or hearts; replaced by the Flute once that is found. | Given by the Flute Boy in the Dark World’s Haunted Grove. |
 Flute | Once the bird is freed, playing it in the Light World calls a bird that flies Link to one of eight spots. | Dig it up with the Shovel in the Light World Haunted Grove, then play it at Kakariko’s weathervane to wake the bird. |
 Bug-Catching Net | Swings to catch bees and fairies for storing in Bottles; can also bat back Agahnim’s energy balls. | Lent by the sick boy in Kakariko Village once Link has a Bottle. |
 Bottle | An empty glass bottle that holds potions, fairies or bees for later use; up to four can be found. | Four in total: Kakariko merchant (100 Rupees), Kakariko inn back room, the man under the bridge near Lake Hylia, and the locked purple chest. |
 Magic Mirror | Warps Link from the Dark World to the same spot in the Light World, or back to a dungeon’s entrance. | Given by the lost old man after Link guides him through the dark cave on Death Mountain. |
 Pegasus Boots | Let Link dash at speed, ramming trees, rock piles, bookshelves and enemies. | Given by Sahasrahla after Link brings back the Pendant of Courage. |
 Power Glove | Lets Link lift light-grey rocks and heavy pots. | Big chest in the Desert Palace. Desert Palace guide |
 Titan’s Mitt | Upgraded gloves strong enough to lift the dark, heavy boulders. | Big chest in Thieves’ Town. Thieves’ Town guide |
 Zora’s Flippers | Allow Link to swim in deep water and ride whirlpools between bodies of water. | Bought from King Zora at Zora’s Waterfall for 500 Rupees. |
 Moon Pearl | Protects Link from the Dark World’s power so he keeps his human form instead of becoming a bunny. | Big chest in the Tower of Hera. Tower of Hera guide |
Magic items
| Item | What it does | Where to get it |
|---|---|---|
 Magic Powder | A sprinkle of powder that transforms certain enemies and objects and wakes the Mad Batter. | Give the Mushroom to the witch at the Magic Shop, leave, then come back and collect it inside the shop. |
 Fire Rod | Shoots fireballs that burn enemies and light torches from a distance; costs magic. | Big chest in Skull Woods. Skull Woods guide |
 Ice Rod | Fires a freezing blast that turns many enemies into ice blocks; costs magic. | Chest in the Ice Cave on Lake Hylia’s east shore, reached by bombing open a second entrance. |
 Cane of Somaria | Creates a block of magic that can weigh down switches, be pushed or be burst into fire; costs magic. | Big chest in Misery Mire. Misery Mire guide |
 Cane of Byrna | Surrounds Link with a damaging shield of spinning light that blocks all harm while magic lasts. | Chest in a spike-filled cave on the Dark World’s Death Mountain. |
 Magic Cape | Makes Link invisible and invulnerable, letting him pass through enemies, spikes and bumpers; drains magic quickly. | Inside the King’s Tomb in the Graveyard, opened by dashing into the grave with the Pegasus Boots. |
Medallions
| Item | What it does | Where to get it |
|---|---|---|
 Bombos Medallion | A screen-wide spell that rings Link with fire and explosions; uses a quarter of the Magic Meter. | Read the tablet on a desert cliff (reached with the Magic Mirror from the Dark World) with the Book of Mudora, then raise the Master Sword. |
 Ether Medallion | A lightning spell that hits every enemy on screen and freezes survivors; needed to open Misery Mire. | Read the tablet west of the Tower of Hera with the Book of Mudora, then raise the Master Sword. |
 Quake Medallion | Shakes the ground to damage or transform grounded enemies; needed to open Turtle Rock. | Throw something into the ring of stones in the Lake of Ill Omen and the Catfish hands it over. |
Heart upgrades
| Item | What it does | Where to get it |
|---|---|---|
 Piece of Heart | A quarter heart; every four collected add one heart to Link’s life gauge. | 24 are hidden around Hyrule: 18 in the Light World and 6 in the Dark World. |
 Heart Container | Adds a full heart to Link’s maximum life. | 11 in total: one in the Sanctuary plus one from the boss of each of the three Light World and seven Dark World dungeons. |
Bottle contents
| Item | What it does | Where to get it |
|---|---|---|
 Red Potion | Fully refills Link’s hearts. | Sold at the Magic Shop near Zora’s River for 120 Rupees (needs an empty Bottle). |
 Green Potion | Fully refills the Magic Meter. | Sold at the Magic Shop for 60 Rupees, or free by throwing an empty Bottle into the Waterfall of Wishing pond. |
 Blue Potion | Fully refills both hearts and magic. | Sold at the Magic Shop for 160 Rupees. |
 Fairy | A bottled fairy revives Link automatically when his hearts run out, or heals him when released. | Catch one with the Bug-Catching Net at a fairy fountain and put it in an empty Bottle. |
 Bee | When released, the bee attacks nearby enemies for a while. | Catch one with the Bug-Catching Net, e.g. from bushes or trees shaken by dashing into them. |
| Golden Bee | A rarer, sparkling bee (called the Good Bee in the SNES text) that fights alongside Link much longer than a normal Bee. | Dash into the fairy statue in the Ice Cave’s fairy fountain on Lake Hylia’s east shore, then catch it with the net. |
Quest items
| Item | What it does | Where to get it |
|---|---|---|
 Mushroom | A strange mushroom that the witch near Zora’s River can brew into Magic Powder. | Lying in a clearing in the Lost Woods. |
 Pendants of Virtue | Three pendants that prove Link worthy of drawing the Master Sword. | Won from the bosses of the Eastern Palace, Desert Palace and Tower of Hera. |
| Pendant of Courage | The green Pendant of Virtue. | Reward for beating the Armos Knights in the Eastern Palace. Eastern Palace guide |
 Pendant of Power | The blue Pendant of Virtue. | Reward for beating the Lanmolas in the Desert Palace. Desert Palace guide |
 Pendant of Wisdom | The red Pendant of Virtue. | Reward for beating Moldorm in the Tower of Hera. Tower of Hera guide |
 Crystals | Seven crystals holding the captive maidens; all seven are needed to enter Ganon’s Tower. | One from the boss of each of the seven Dark World dungeons from the Palace of Darkness to Turtle Rock. |
Dungeon items
| Item | What it does | Where to get it |
|---|---|---|
 Dungeon Map | Shows the layout of every floor of the current dungeon and which rooms have been visited. | A chest in each dungeon. |
 Compass | Marks the boss’s room on the dungeon map. | A chest in each dungeon except Hyrule Castle, which has none. |
 Big Key | Opens the big locked door and the big treasure chest in the dungeon where it is found. | A chest in each dungeon. |
 Small Key | Opens one locked door in the dungeon where it is found. | Chests, enemies and hidden spots inside dungeons. |
Sources & picture credits
- Items in A Link to the Past (Zeldapedia)
- Lamp (Zeldapedia)
- Boomerang (Zeldapedia)
- Magical Boomerang (Zeldapedia)
- Bow (Zeldapedia)
- Silver Arrows (Zeldapedia)
- Hookshot (Zeldapedia)
- Bombs (Zeldapedia)
- Mushroom (Zeldapedia)
- Magic Powder (Zeldapedia)
- Fire Rod (Zeldapedia)
- Ice Rod (Zeldapedia)
- Bombos Medallion (Zeldapedia)
- Ether Medallion (Zeldapedia)
- Quake Medallion (Zeldapedia)
- Book of Mudora (Zeldapedia)
- Magic Hammer (Zeldapedia)
- Shovel (Zeldapedia)
- Flute (Zeldapedia)
- Bug-Catching Net (Zeldapedia)
- Bottle (Zeldapedia)
- Cane of Somaria (Zeldapedia)
- Cane of Byrna (Zeldapedia)
- Magic Cape (Zeldapedia)
- Magic Mirror (Zeldapedia)
- Pegasus Boots (Zeldapedia)
- Power Glove (Zeldapedia)
- Titan’s Mitt (Zeldapedia)
- Zora’s Flippers (Zeldapedia)
- Moon Pearl (Zeldapedia)
- Fighter’s Sword (Zeldapedia)
- Master Sword (Zeldapedia)
- Tempered Sword (Zeldapedia)
- Golden Sword (Zeldapedia)
- Fighter’s Shield (Zeldapedia)
- Fire Shield (Zeldapedia)
- Mirror Shield (Zeldapedia)
- Green Clothes (Zeldapedia)
- Blue Mail (Zeldapedia)
- Red Mail (Zeldapedia)
- Piece of Heart (Zeldapedia)
- Heart Container (Zeldapedia)
- Pendant of Wisdom (Zeldapedia)
- Pendant of Courage (Zeldapedia)
- Crystals (Zeldapedia)
- Dungeon Map (Zeldapedia)
- Compass (Zeldapedia)
- Big Key (Zeldapedia)
- Small Key (Zeldapedia)
- Red Potion (Zeldapedia)
- Green Potion (Zeldapedia)
- Blue Potion (Zeldapedia)
- Fairy (Zeldapedia)
- Bee (Zeldapedia)
- Golden Bee (Zeldapedia)
- Super Bomb (Zeldapedia)
Guide text is original retrogameindex writing, checked against Zeldapedia. Screenshots, sprites and artwork © Nintendo; local copies archived from Zeldapedia file pages (listed on the image gallery).