Pit areas, Dash Zones and track objects
Identify actual original-game track objects without treating F-Zero as an inventory-based game.
Original 1990 Super Famicom / 1991 international SNES F-Zero. Single-player Grand Prix and Practice are covered. Super Jet stock is earned by completing laps; this game does not use the energy-draining boost of later entries. F-Zero X, GX and 99 rules are outside this reference.
Illustrated reference
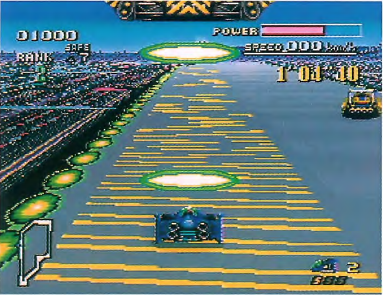
Pit area
The yellow pit strip allows the official recharge craft to restore machine power. Stay within the designated area for a controlled repair, balancing time spent there against the race position you need.
Actual original F-Zero gameplay showing the yellow pit strip and recharge craft, reproduced in Nintendo’s original manual, printed page 13.
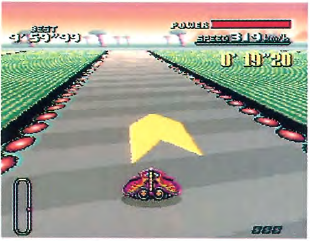
Dash Zone
The yellow arrow on Death Wind is a fixed Dash Zone that increases speed. Inspect the straight and its exit before crossing it, especially when traffic leaves little room to adjust.
Actual original F-Zero Death Wind gameplay showing a yellow arrow Dash Zone; original manual screenshot, printed page 19.
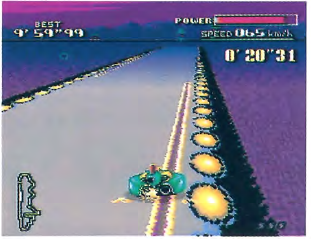
Magnetic track edge
Port Town’s magnetic sections pull a machine toward the edge. Leave space beside the barrier and correct deliberately rather than waiting for repeated contact to reveal the direction of the force.
Actual original F-Zero Port Town gameplay showing the magnetic pull near the track edge; original manual screenshot, printed page 19.
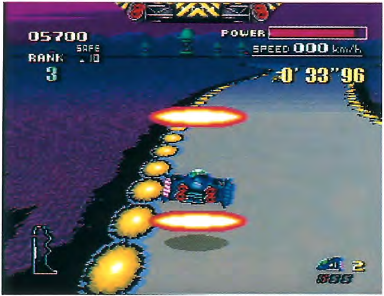
Official guide beam
The official guide beam can return a machine after an extreme shortcut is ruled a foul. The screenshot shows that game system in action; relying on it interrupts an otherwise clean racing line.
Actual original F-Zero gameplay showing the official guide beam returning a machine after a shortcut foul; original manual, printed page 13.
Plan the pit approach before you need it
The yellow pit strip provides a designated area where the official craft can restore machine power. The original manual ties the repair amount to the time spent inside that area. Learn which side of the home straight it occupies before arriving with a weak power bar. A predictable approach is safer than a sudden swerve across traffic when the repair zone comes into view.
Treat a Dash Zone as a commitment
Arrow-shaped Dash Zones give an immediate speed increase when crossed. Look beyond the arrow to the next bend, because the useful question is whether the following section can support that speed. These are fixed track features, unlike the Super Jet stock earned through laps. Use an already familiar Dash Zone to practise control before attempting it during a crowded Grand Prix fight for position.
Expect correction near track edges
Port Town includes magnetic pull that can draw a machine toward an edge. Lean and steer deliberately when approaching that section, leaving room for the force to alter your path. The official guide beam can also reposition a machine when a shortcut is judged too extreme. Avoid building a route around a recovery animation: it interrupts progress and makes the next landing less predictable than staying inside the course.
F-Zero has no conventional pickup inventory. These selected entries are track objects and official course systems, illustrated with original gameplay screenshots.
Picture details
Game artwork belongs to its respective rights holders.