Equipment, weapons and key items
Where important tools enter the adventure, what they do, and when to revisit earlier obstacles.
Story and late-game spoilers.
Original GameCube and Wii releases; the Wii world is mirrored. HD differences are not covered.
8 items · one picture per entry · open a picture for full size.
Item directory

Gale Boomerang
Carries a small whirlwind and can target multiple points. Some devices need the wind effect rather than a direct weapon hit.
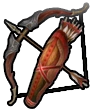
Hero’s Bow
Enables accurate long-range shots. Later combinations such as bomb arrows expand its role; check ammunition before a ranged puzzle or fight.

Clawshot / Double Clawshots
Lakebed Temple / City in the Sky. Pull Link to compatible targets.

Spinner
Rides special tracks and interacts with matching mechanisms. Its uses are tied to designed surfaces, not unrestricted travel across the entire map.

Ball and Chain
Breaks heavy ice and delivers powerful strikes. Leave space for its slow attack and return instead of using it like a fast sword swing.

Dominion Rod
Controls appropriate statues. Study what the statue can reach and operate, rather than only what Link can reach himself.

Iron Boots
Their role extends beyond sinking underwater. Watch for heavy switches and magnetic routes where increased weight changes navigation.

Lantern
Useful in dark areas and particular obstacles. Carry fuel when exploring away from shops, and put it away when ordinary visibility is sufficient.